I am so sorry for not posting anything in these last few days. It has been a quite busy week for me.
Anyway, today I am going to show you all a tutorial on how to do OWL nail art with your nail polish. This one demands a little more work, but in the end when you see the results, you will be smiling from ear to ear. Well at least it was in my case. It is just so stinking cute!!! I can't get enough of it. I found myself looking at my nails so much, lol.
Ok, let's make some cute nails. Tools that are needed in creating this look will be dotting tools or tooth pick if you don't have a dotting tools, nail polishes, cotton balls (to put acetone on it) when you are doing the eyes, nose and body because you need to change colors fast so you just dip your dotting tool in the cotton ball. Here are the lists of the nail polishes that I use:
on my left fingers, I use Essie Super Bossa Novva, Essie Raise Awareness, Nicole by OPI one time lime, Nicole by OPI my lifesaver, Nicole by OPI prized possession purple, Color Club (pastel ), Pop Beauty nail glam (it doesn't have a name so i will post a picture for this one), Nicole by OPI "Baby-Blue".
on my right fingers, I use all Cynthia Rowley neon colors as base, they all don't have names. sorry, OPI I'm a Belieber, Color Clubs neon pastel.
For nose: Julep Daisy.
For eyes: Wet and Wild Shine Black Creme and Essie yes we can, Pink!
For my pinky: Essie Super Bossa Novva, Kat Von D Wonderchild and Mad Max, Nicole by OPI one time lime, Wet and Wild fast dry in Silvivor.
For the glitter: Barielle Shades in Pink Diamond, Nail Art nail polish.
Here are the pictures of the products that don't have names.


I use a lot of different colors of nail polish. The reason behind it is because I want to have different colors of Owls. Yes, yes "why" will be the question. My answer: Why not? It is FUN. :) What I did on my left fingers was I added glitter to all the owls while on my right fingers, neon colors. So you see, this is the reason why I will not post every picture of the nail polish that I used. I will just tell you the colors that I use to make the owl. I used, red with light pink, green with pastel green, blue with pastel blue, and purple with light purple(This is for my left fingers.) Then I used, in neon, orange with light orange, purple with light purple, pink with light pink and blue with light blue. In the picture that you will see later on, I have different designs on both of my pinkies. The reason being is because I couldn't decide on what I really wanted to do on my nails that day so I asked my husband to pick for me which one that he liked better. He said the owl hence the reason why you see I did the Owl on the rest of my fingers. I just matched the right pinky with the rainbow fish design. That's right the design on my pinky is called the rainbow fish art. I saw it on Pinterest and fell in love with the way it was done as well as the colors that I decided I wanted to try to do that nail design.

This is what nails look like when I asked my husband which design he liked best.
This is the dotting tool that I used.

Anyhow, back to the tutorial, hahaha sorry I kind of got distracted there.

First, of course, always start with a base.

Then put a french tip strip on the bottom of your nails to create the half moon angle. Do two coats of the base colors. (purple in my case)

Then once you have put the 2 coats of colors, slowly peel the strip off of your nail. Wait for a few minutes to let it dry.
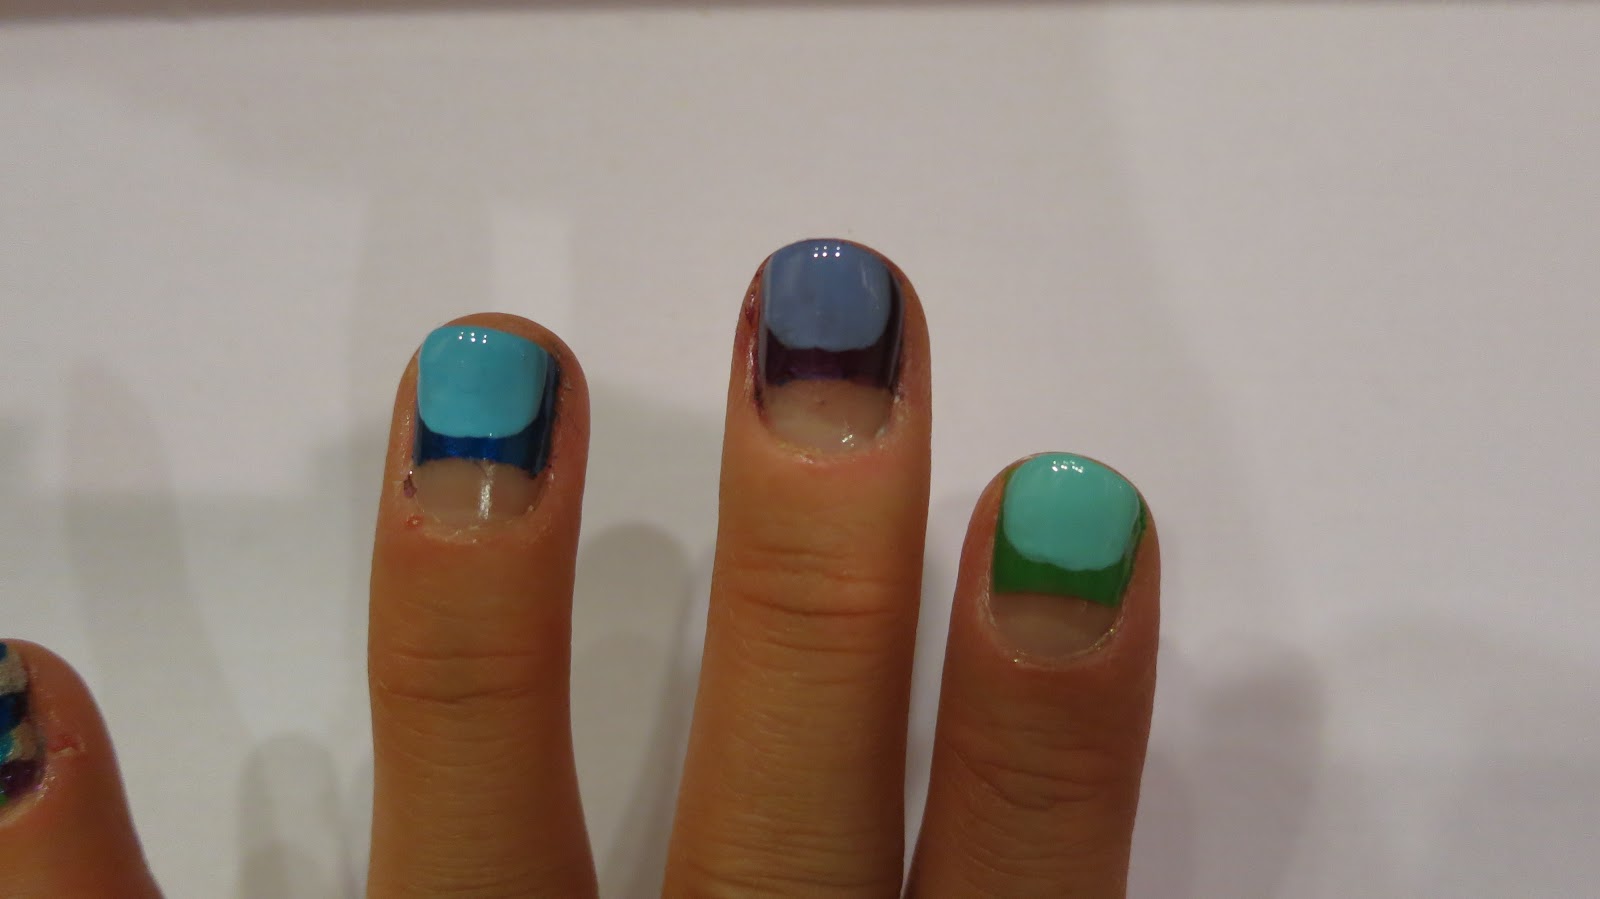
Once it dries to a point where you are comfortable that it will not ruin your base color, add the pastel/lighter color and create a half circle. Do all these steps on the rest of your fingernails.
With my left fingers, I also added glitter on each body but if you don't want to do glitter, you can skip it.
 These are my right fingernails with all the neon colors that I was telling you about. :)
Once you are done with all of these, grab your dotting tool. Start dotting! I start from bottom to top. You can start wherever you feel comfortable. I did 3 dots on the bottom of the body and two on top. Then I use yellow for the nose in the middle and then black and white for the eyes. Look at this picture for reference regarding where to dot. Happy dotting!
Ok, I forgot that since this is my first experiment on my thumb, I did more dots on the body but I did not like how it looks so I changed it to only make 3 dots on the bottom and two on top.
Finally, after all of that then this is how your nails will look. Cute right? I really had so much fun doing this. I love it. I hope you like it as much as I do.

This is the picture of my glitter owls.

Well that is all for now. I hope you like it and guess what, I will start posting other beauty related posts too, not just nails. The reason I have not done it yet is due to the "boo boo" I have on my face so I can't put make up on to show you guys how the colors look. That is why I decided to put make up on hold and do nails and other posts first. I also will start my Youtube channel so be sure to visit me on Youtube. I would love to hear your opinions on how I can improve as well as what you like or dislike about my blog. Well until next time. Thanks for visiting!!
No comments:
Post a Comment